Busyboards amaze lots of people, and I have met hundreds of adults who go oohing and ahhing about them. Making a busy board is so fun! – they say. I can make one today! – they say.
Busy boards really amuse both babies and adults, and they really are highly DIY-able. Yet, as the one gets to his own project, the reality kicks in. First, it’s a time-consuming process. Second, for the best result, you need to spend a lot on supplies like paints, sandpaper, hardware, and painters tape.
Making a busy board can turn out costing too much
Often in the busy board tutorials, I run across the bottom lines where authors claim spending at least $50 to $100 on the busy board parts. Add here the gas, the time, and the medical bill for the pierced fingers – in case you’re an absolute beginner with the DIY projects – and you will definitely have second thoughts about making a busy board.
But this is not how it should be! Scroll and find out how to spend as little as possible when making a busyboard.
1. Start Early
The busy board should be ready when your little one is about 9 months old. The earlier you start, the more time you will have to think out your design and collect the parts you need. Give yourself some time to go through the busy board pins, and think of a place where you will put yours.
2. Plan it out
Do you have some specific area that could use a spruce-up? Is a busyboard going to dwell in the playroom? Nursery? Maybe living area, so you can keep an eye on your toddler while cooking or doing chores, or handling your business? Busyboard makes an awesome decor element, too, absolutely beautifying any space – consider this.
3. Set the priorities
As you decide on the exact place, measure it to know your busy board dimensions. Also, check the color scheme around that you will be adjusting the busyboard to. Decide if you want to go with the plain wood looks, painted one, or maybe mix the best from both ideas.
4. Find all you can get for free
Where to get free parts for busyboards?
????
Give a call to all your friends and family notifying them that you’re making a busy board and will gratefully accept any bits and pieces they have in their junk drawers. In a couple of weeks, you’ll probably get delivery of outdated, misplaced, or hoarded knick-knacks.
?????
Make sure you notify the grandparents in the first place – they probably will be happy to contribute and declutter their garage just a bit.
??
Do not hesitate to bring up your search for parts on the neighbor forums. The chances are high that people can pull out something for you right away from their junk drawer – and thank you by the way for helping them to get rid of clutter.
?
Make some parts yourself: cut out the small doors from the wooden scraps, make your own handles, or make the rope puzzle to push your baby’s inventiveness in a true Montessori way.
♻️
Do you upcycle? For the homemade boards, the screwtops from plastic bottles and jars work amazing.
5. Be creative
Get creative when looking for busy board parts. Hardware, latches and locks are classical. Yet, don’t limit yourself. Some most marvelous details come from weird places.
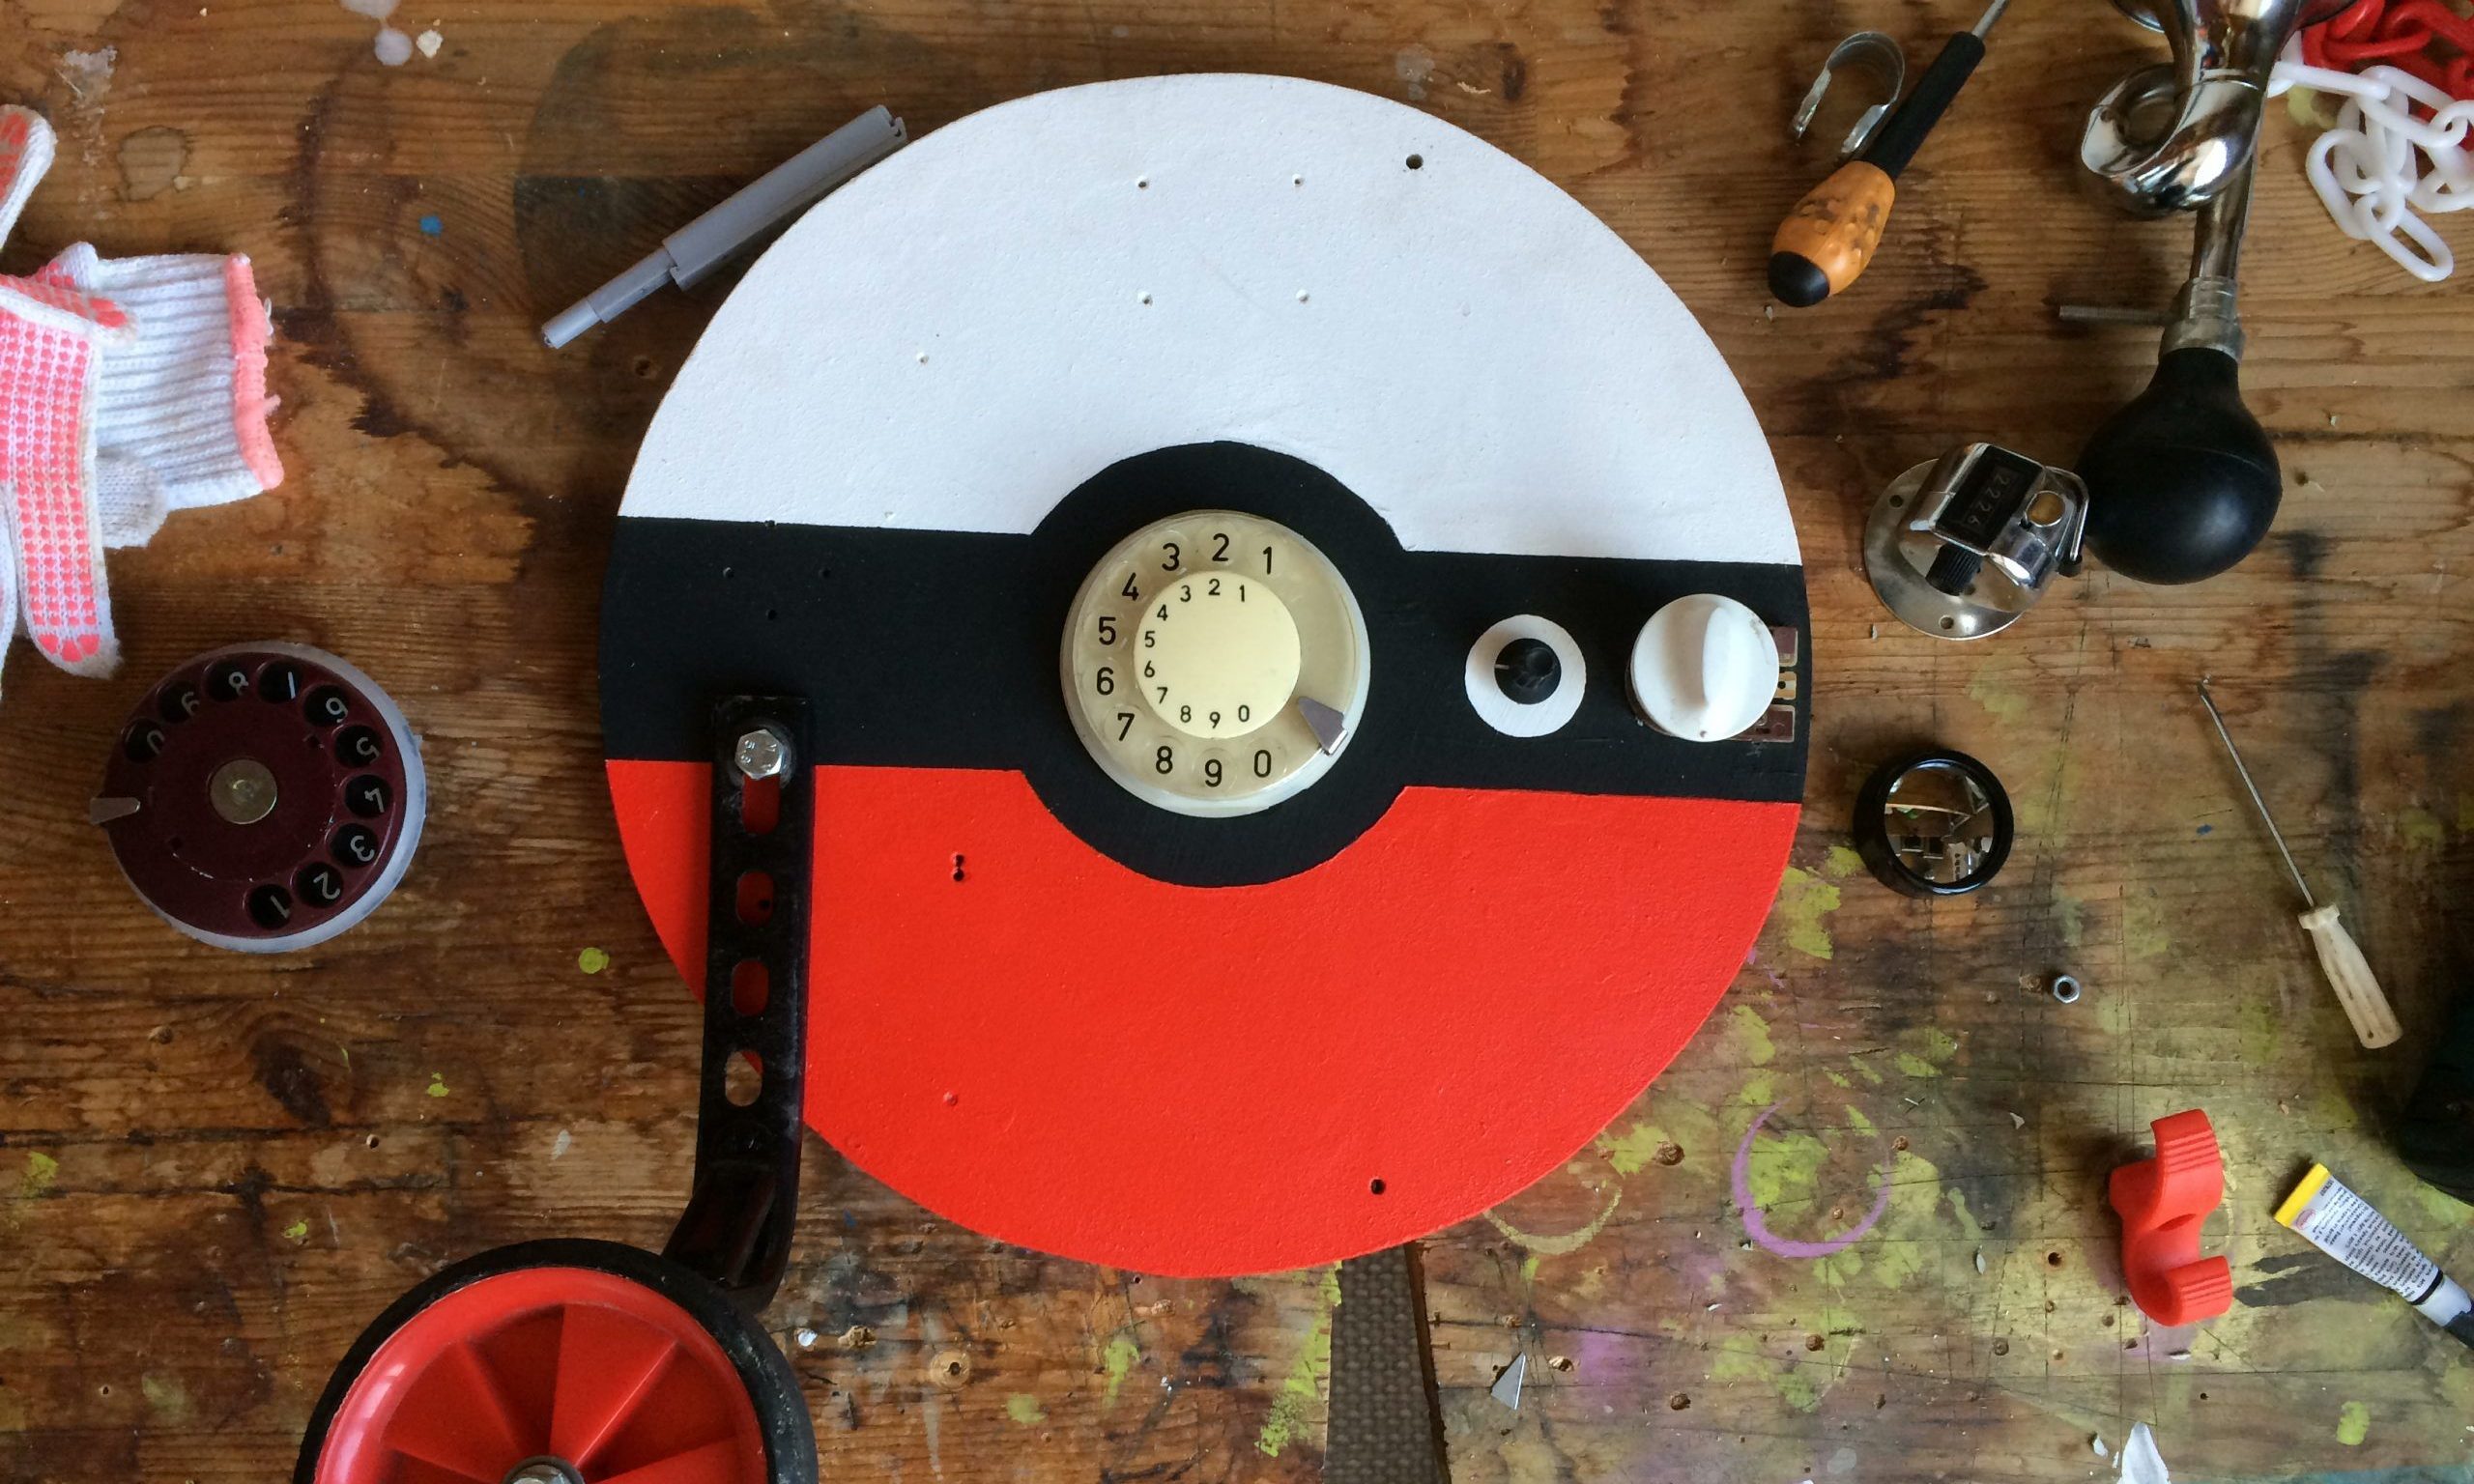
For example,
6. Get thrifty
Thrift stores are a part bonanza. Here you can get to some whacky retro stuff, like rotary phones and old factory-grade switches.
7. Base board
You can use any board you have lying around in dry fine conditions. Look into old shelves you’re not using anymore, or a cupboard door, a piece of an old closet or some cut-offs from your other projects. As long as it’s even, clean, solid wood and not too heavy, you can use it.
8. Don't limit yourself
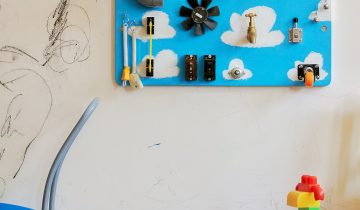
The busy boards can come in any size or the shape. If it fits into the space you have for it, way to go. I love the option of a long busy board, as it allows for the more even layout and lets several kids play with it at once. Also, round busy boards are superb. They are a bit trickier to lay out but always turn out so pretty.
9. All should feel smooth and safe
When you get your board, sand thoroughly on front and on the sides, and round up all the corners so it’s all smooth and nice to touch. You definitely don’t want your baby to get any splinters from it, so go over several times and check it all out with your bare hand.
10. Leave it as is for the plain wood
Varnish, in my opinion, is a pain. You gotta look for the child-safe one, and then wait for it to dry which takes forever. And it’s not getting your project any cheaper, for sure. So if you want plain wood, you can just leave it as is, or wax it just a little.
11. Or get the child-safe paints
If you’re going for the painted busy board, you’ll need to use child-safe paints. Now, if you’re a crafty one, and have some acrylic paints lying around, you’re actually good to go. If not, think if someone has had any renovations made recently? If they used quality brand name interior acrylic paints for the walls, these can be used for the busy boards as they are most often safe for the babies.
12. Add an accent
Plan the designs with the colors that you can get for free. Don’t overlook the white or even beige – they make nice combinations. To add an accent, a small tube of plain acrylics from the art store will do the trick. A regular busy board of approximately 15×24 inches can be covered in a few layers with a half-tube (70ml) of the acrylic, so no need to buy a huge bucket.
13. Paint the busy board
Use patterns and simple shapes to liven up your layout – it helps even in the case of dullest colors. Go diagonal stripes for gender-neutral dynamic feeling. Let dry.
14. Now, you can do that run to the hardware shop
While the board is drying, it’s the best time to pay a quick visit to the hardware store. Why is it great to do it on this stage if you want to save? Because at this stage you will only need:
- 1-2 elements you’re still missing;
- Small screws in various sizes;
- 1 x 2-mm and 1 x 3-mm drill bits;
15. Borrow second power drill to make a busy board twice as fast
The assembly can take you about one to three hours, depending on the size of the board and the number of power drills you have. Be ready to get creative with the screws.
Your little nugget adores it, while you are feeling extremely proud. Moreover, if you did everything right, it only cost you peanuts.
Now mount it to the wall, step back, and let your happy little explorer pull, push, switch, and rumble their hearts out.


 No products in the cart.
I had no idea these existed but they look like so much fun! Thanks for sharing!
Tash – http://www.agirlwithview.co.uk
Hi Natasha, you never stop learning, eh? 😉 They’re the best toddler toys ever!